How to Schedule Vulnerability Scans
Last updated: July 16, 2025
What This Article Covers
This article provides a step-by-step guide on how to schedule vulnerability scans and pentest using Astra's automation features. It covers creating a new scan schedule, selecting targets, configuring scan mode and frequency, and managing existing schedules.
Who Should Read This
This article is for Astra users who want to automate their security assessments by scheduling regular vulnerability scans or pentest, ensuring continuous monitoring of their targets.
Why This Matters
Continuous vulnerability scanning is crucial for maintaining a strong security posture and achieving ongoing compliance. Here's why it truly helps:
Adapts to Constant Change: New vulnerabilities emerge daily, and your applications and infrastructure are always evolving. Scheduled scans ensure you're continuously checking for the latest threats and addressing new security gaps introduced by updates.
Meets Compliance: Many standards like PCI-DSS, GDPR, HIPAA, SOC 2, and ISO 27001 require ongoing security assessments. Automated scans fulfill these demands, providing up-to-date reports for audits and demonstrating a proactive approach to security.
Proactive Risk Reduction: By identifying weaknesses early and continuously, you prevent costly breaches and reduce overall security risks. This proactive approach builds trust with stakeholders by showing a commitment to protecting sensitive data.
Automating your vulnerability scans transforms security from a periodic task into an integrated, continuous process, offering real-time insights and significant benefits for your compliance and overall security.
Scheduling Vulnerability Scans & Pentest with Astra
Astra's automation features allow you to schedule your scans in advance and continuously test your targets.
Step 1: Access Schedule Scan Settings
Log in to your Astra dashboard.
From the Dashboard page, click on Schedule Scan in the navigation bar on the left side.

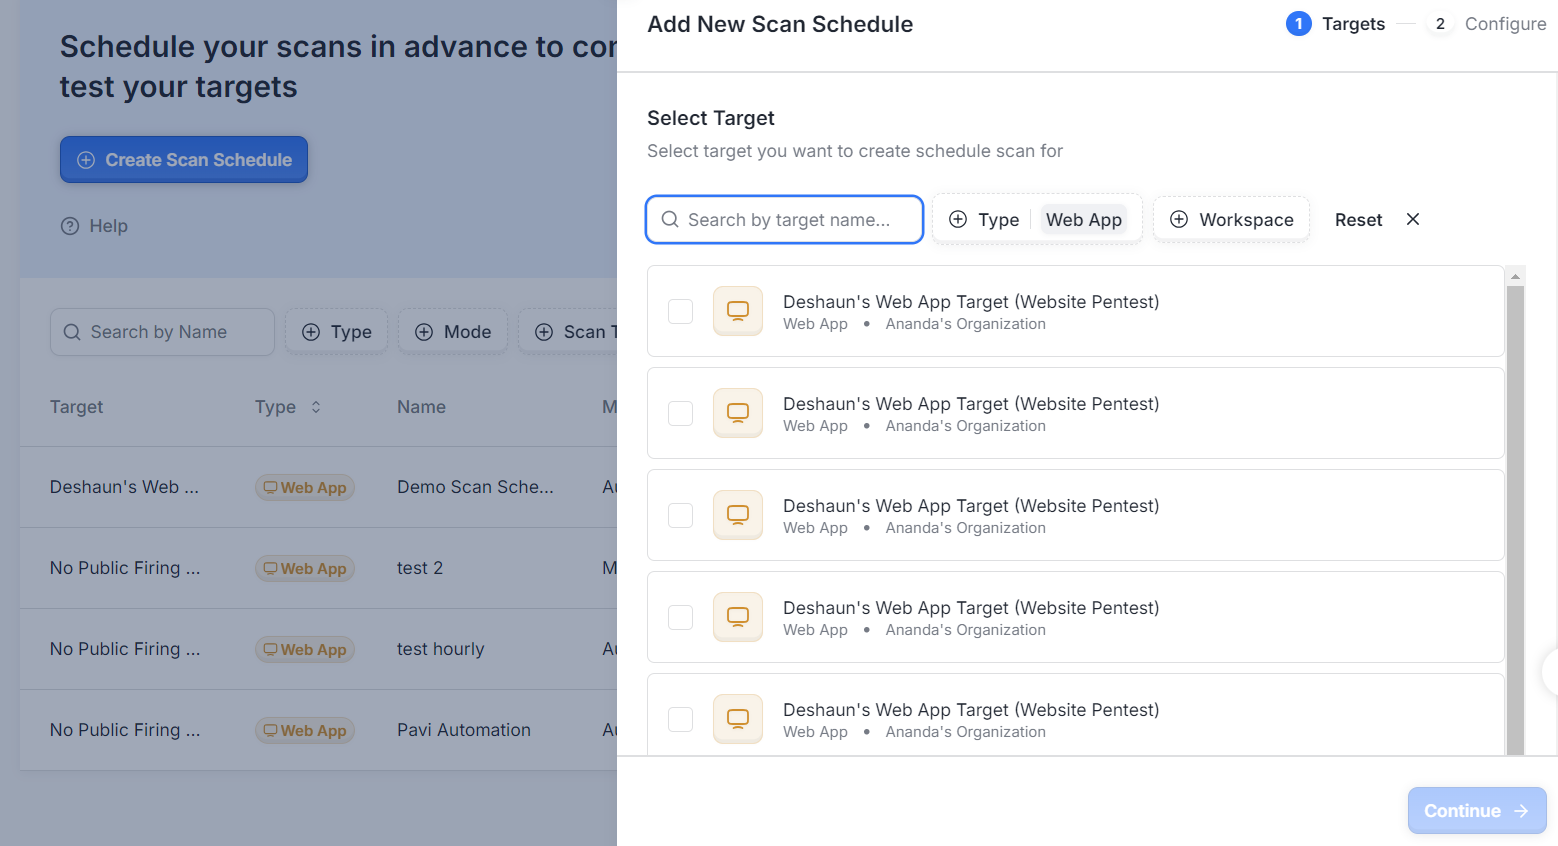
Step 2: Create a New Scan Schedule
Click on the Create Scan Schedule button.
A window will appear allowing you to select the target you want to schedule scans for. Choose your desired target(s).
Click on Continue at the bottom.
Step 3: Configure the Schedule Details
Once you proceed, you'll set up the specifics of your scan schedule:
Give a name to the schedule (e.g., "Weekly Web App Scan").
Select the correct timezone for the scan execution.
Choose the scan mode you want to schedule (e.g., automated scan, manual pentest). Know more about scan modes [here].
Set the scan frequency (e.g., daily, weekly, monthly, specific days/times).
Click on the Add Scan Schedule button to create the schedule.
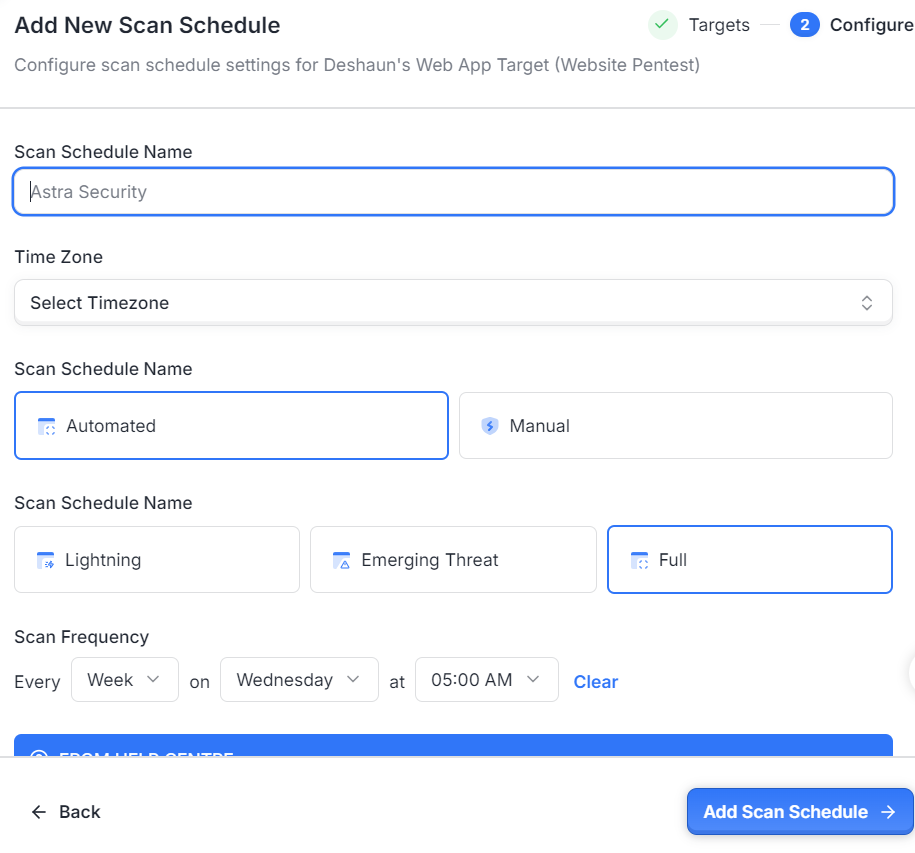
The scan will auto-start based on the frequency and time that you have set.
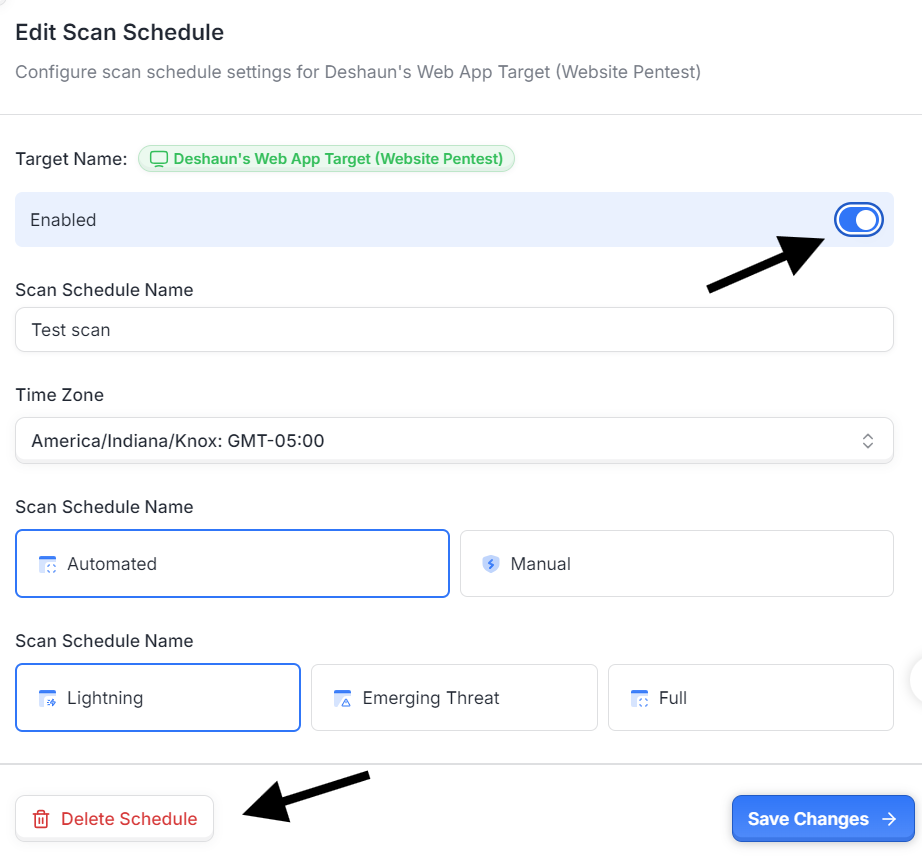
Managing Existing Schedules
You can easily manage your existing scan schedules:
To disable a schedule:
Click on the respective schedule under "Existing Schedules".
Click on the Enable toggle to turn it off.
To delete a schedule:
Click on the respective schedule under "Existing Schedules".
Click on Delete Schedule at the bottom.
Need help? Raise a support ticket anytime from your Astra dashboard.